On a hushed Tuesday evening, Emma bent over her brand-new glass ceramic cooktop (glass-ceramic hob) and stopped dead.
In the hard glare of the under-cupboard lighting, a fine white line cut across the glossy black surface, souring her mood in an instant.
She’d owned it for just six months.
No pan dropped, no culinary calamity - simply a mark that refused to wipe off, no matter how long she rubbed.
By the weekend, she was sat at the kitchen table staring at an appliance repair quote for close to £300 to “refinish” the top.
The technician’s parting note kept looping in her head: “If you don’t sort it quickly, it’ll only get worse.”
Later that night, doom-scrolling on her phone, she landed in a home repair group where a stranger breezily insisted you could clear those marks in minutes using things most households already have.
That’s when the frustration really kicked in.
Why tiny scratches on a glass ceramic cooktop are turning into big money
All over the UK, owners of glass ceramic cooktops are having the same gut-sink moment as Emma.
One faint pale line on a sleek black surface, and suddenly the whole kitchen can look dated, tired - even a bit grimy.
Repair firms understand the psychology.
These showroom-smooth black panels are often the visual centrepiece of a modern kitchen, so even a small defect grabs attention immediately.
So when a professional says, “You should really have that repaired properly,” many people comply.
It feels safer than gambling on a vague DIY tip, especially when the surface is sold as “specialist” and “high-tech”.
But a different message is circulating among appliance technicians and DIYers.
They argue that a large share of alleged “scratches” can be lifted, blended, or buffed out in under 10 minutes.
For something closer to the cost of a coffee than a chunky invoice.
Spend a few minutes on any home forum and you’ll see the same storyline repeat.
Someone posts a worried photo of a marked hob, followed by replies like: “Mine looked like that - I paid £250,” or “They said the whole top needed replacing.”
Then the contrarians arrive.
One swears that a dab of plain white toothpaste and a microfibre cloth did the job.
Another shares before-and-after images after using a small amount of cerium oxide glass polish - the type commonly used on car windscreens.
Behind the anecdotes are some uncomfortable figures.
Replacing a full glass ceramic cooktop can cost £350 to £700+, depending on make and model.
Even a “professional buffing and refinishing” visit can tip beyond £200 once you add the call-out charge.
Set that beside a £10 polishing kit or a £4 tube of non-gel toothpaste, and it’s easy to see why people feel taken for a ride.
A big part of the mess is terminology.
Many of us call anything white, grey, hazy, or cloudy a “scratch”, even though those marks aren’t all the same.
Light scuffs from pan movement, limescale traces from boiling water, and baked-on residue often sit on top of the glass ceramic rather than cutting into it.
Those are frequently removable with simple polishing or gentle dissolving methods.
Deep gouges are different, and they can become a safety issue.
That’s the angle professionals tend to emphasise - sometimes mixing genuine caution with a sales opportunity.
The blunt reality: most day-to-day “scratches” on a glass ceramic cooktop are cosmetic surface damage, not structural catastrophe.
Once you grasp that distinction, those eye-watering quotes start to look far less inevitable.
The “two-minute test” experts use before paying for glass ceramic cooktop repairs
The first tip many off-duty appliance engineers share isn’t a magic product at all.
It’s a quick, low-tech check they do before anyone talks about money.
Gently draw a clean, dry fingernail across the mark.
If your nail catches clearly, you might be looking at a deeper groove - and aggressive DIY polishing could do more harm than good.
If your nail slides over smoothly, or you can barely feel anything, it’s more likely a superficial scuff, mineral deposit, or residue.
That’s the ideal territory for careful at-home fixes.
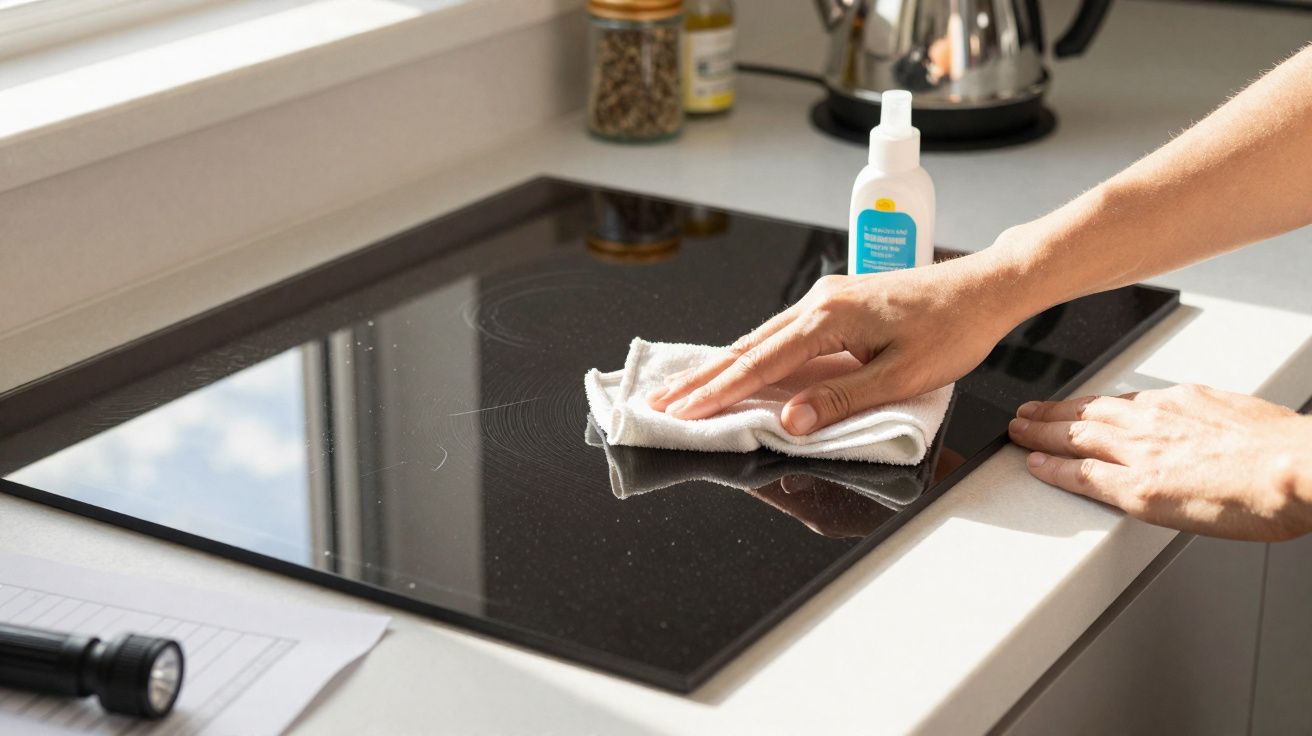
From there, the approach is almost unexciting in its simplicity.
Let the cooktop cool completely, wipe away loose crumbs, then apply a tiny amount of a mild abrasive: a dedicated glass-ceramic cleaner, a baking soda paste, or plain white toothpaste.
Work in soft circular motions using a microfibre cloth.
Use light pressure, give it a little time, then wipe clean and inspect under bright light.
A lot of damage happens long before anyone even considers “repairs”.
Not because people don’t care, but because fear and bad advice make us do silly things.
Someone uses the green side of a sponge “just this once”.
Or a heavy cast-iron pan gets dragged across the surface instead of lifted.
Some try to attack burnt-on patches with a razor blade held at an awkward angle, catching the glass.
Others set a hot, gritty pan down in the same place repeatedly, effectively grinding micro-scratches in like fine sandpaper.
We all recognise that after-dinner moment: “I’ll do a proper clean tomorrow.”
And in reality, almost nobody does that every single day.
The gentler your everyday habits, the more forgiving your cooktop will be when you later need to polish out minor flaws.
It’s also worth checking the practicalities before you start: if your hob is still under warranty, look up the manufacturer’s cleaning guidance.
Some brands specify approved cleaners and scraper types; following that advice can protect you if you later need a warranty call-out.
Finally, prevention is often cheaper than any polish.
Keeping pan bases clean and dry, wiping up sugary spills promptly (which can etch when heated), and avoiding gritty salt or seasoning on the surface can reduce the build-up that gets mistaken for “scratches”.
“People are paying hundreds for what is basically a five-minute polish,” says Marc, an independent appliance technician who now publishes tutorials online.
“The industry benefits from making glass ceramic sound mystical and untouchable. It’s tough, it’s engineered - and yes, it can be cleaned.”
- Safe DIY “scratch check”
Do the fingernail test, then trial a mild polish in a small, discreet area before you work on the visible section. - Gentle polishing kit
Keep a soft microfibre cloth, non-gel toothpaste or a specialist glass-ceramic cleaner, plus a spray bottle of water, under the sink. - Professional red-flag signs
- Obvious chips, cracks, or starburst-style fractures that reach towards the edge of the heating zone
- Scratches that catch your nail deeply and run directly across the active heating ring
- Obvious chips, cracks, or starburst-style fractures that reach towards the edge of the heating zone
Why the “erased in minutes” trick is shaking trust at home
When someone realises a £200 “refinishing” visit delivered the same outcome they can achieve with a cloth and a mild polish, something changes.
It isn’t only the cost - though that certainly hurts.
It’s the trust issue.
Trust in what “expert” is supposed to mean.
Trust in the assumption that modern surfaces must be handled only by professionals.
More homeowners are recording their own trials, uploading the failures as well as the wins.
One woman shows a first attempt where nothing improves, then tries again with better lighting and a different cleaner - and on camera the line visibly fades.
Those clips don’t just rack up views.
They quietly rewrite the unspoken rules about who gets to “authorise” what happens in a kitchen.
| Key point | Detail | Value for the reader |
|---|---|---|
| Check before you panic | Use bright light and the fingernail test to tell a surface scuff from a deeper groove | Stops you rushing into expensive repairs when a gentle polish may be enough |
| Start with mild methods | Work on a cool, clean surface; use tiny amounts of toothpaste, baking soda paste, or glass-ceramic cleaner with a microfibre cloth | A low-risk, low-cost way to improve appearance in minutes |
| Know when to call a pro | Chips, cracks, or deep scratches across heating zones may be structural rather than cosmetic | Helps protect safety and prevents hidden damage worsening |
FAQ: Glass ceramic cooktop scratches
Can every scratch on a glass ceramic cooktop be removed?
No. Light surface scuffs and residue often polish out, but deep grooves, chips, or cracks typically can’t be safely erased and may need professional assessment or replacement.Is toothpaste really safe for my cooktop?
A small amount of plain white, non-gel toothpaste can work as a very mild abrasive on many glass ceramic tops. Test a discreet corner first, use gentle pressure, and wipe completely afterwards.What products should I avoid completely?
Avoid wire wool, abrasive pads, powdered scouring products, and harsh chemical cleaners that aren’t labelled for glass ceramic. They can create fresh scratches or dull patches that no polishing will put right.How often should I polish my glass ceramic surface?
Only polish lightly when you can see scuffs or hazy areas. For day-to-day care, routine cleaning with a soft cloth and a gentle cleaner after cooking is usually sufficient.When is a scratch actually dangerous?
If the mark clearly catches your fingernail, crosses an active burner ring, or looks like a crack or chip, speak to a professional. Damage that penetrates the surface can affect heat distribution and safety.


Comments
No comments yet. Be the first to comment!
Leave a Comment